CoreGraphicsAndAnimation(1)
发表于|更新于
|阅读量:
绘图
成品展示

UIBezierPath
说到绘图,那么有一个不得不讲的对象,那就是UIBezierPath。先来看几个UIBezierPath里面比较重要的API。我都已经做了注释,功能还是比较强大的。
1
2
3
4
5
6
7
8
9
10
11
12
13
14
15
16
17
18
19
20
21
| + (instancetype)bezierPath;
+ (instancetype)bezierPathWithRect:(CGRect)rect;
+ (instancetype)bezierPathWithOvalInRect:(CGRect)rect;
+ (instancetype)bezierPathWithRoundedRect:(CGRect)rect cornerRadius:(CGFloat)cornerRadius;
+ (instancetype)bezierPathWithRoundedRect:(CGRect)rect byRoundingCorners:(UIRectCorner)corners cornerRadii:(CGSize)cornerRadii;
+ (instancetype)bezierPathWithArcCenter:(CGPoint)center radius:(CGFloat)radius startAngle:(CGFloat)startAngle endAngle:(CGFloat)endAngle clockwise:(BOOL)clockwise;
+ (instancetype)bezierPathWithCGPath:(CGPathRef)CGPath;
- (instancetype)init NS_DESIGNATED_INITIALIZER;
- (void)moveToPoint:(CGPoint)point;
- (void)addLineToPoint:(CGPoint)point;
- (void)addCurveToPoint:(CGPoint)endPoint controlPoint1:(CGPoint)controlPoint1 controlPoint2:(CGPoint)controlPoint2;
- (void)addQuadCurveToPoint:(CGPoint)endPoint controlPoint:(CGPoint)controlPoint;
- (void)addArcWithCenter:(CGPoint)center radius:(CGFloat)radius startAngle:(CGFloat)startAngle endAngle:(CGFloat)endAngle clockwise:(BOOL)clockwise NS_AVAILABLE_IOS(4_0);
- (void)closePath;
- (void)fill;
- (void)stroke;
- (void)addClip;
@end
|
梯度
梯度的实现在ios里面有俩种方式,一种是通过CAGradientLayer去绘制,一种是通过CGGradientRef使用DrawRect:方法去绘制,我这里采用的是第二种方式。
实现方式,首先创建了一个CYShapeView的基类,该类可以设置一些属性值,如外边界色,里边界色,划线色,线宽等。方便子类继承它。通过设置的这些属性,可以获取到需要的梯度Ref指针。
下面是具体的代码
1
2
3
4
5
6
7
8
9
10
11
12
13
14
15
16
17
18
19
20
21
22
23
24
25
26
27
28
29
30
31
32
33
34
35
36
37
38
39
40
41
42
43
44
45
46
47
48
49
50
51
52
53
54
55
56
57
58
59
60
61
62
63
64
65
66
67
| @interface CYShapedView : UIView
@property (nonatomic, strong) UIColor *innerColor;
@property (nonatomic, strong) UIColor *outerColor;
@property (nonatomic, strong) UIColor *strokeColor;
@property (nonatomic, assign) CGFloat lineThickness;
- (CGGradientRef)gradientWithColor:(UIColor *)c1
toColor:(UIColor *)c2
count:(CGFloat)colorNumb;
@end
@implementation CYShapedView
- (id)initWithFrame:(CGRect)frame
{
self = [super initWithFrame:frame];
if (self) {
self.innerColor = [UIColor redColor];
self.outerColor = [UIColor yellowColor];
self.strokeColor = [UIColor blackColor];
self.lineThickness = 3.f;
self.backgroundColor = [UIColor clearColor];
}
return self;
}
- (void)setLineThickness:(CGFloat)lineThickness
{
CGFloat totalWidth = self.bounds.size.width;
CGFloat totalHeight = self.bounds.size.height;
CGFloat halfWidth = totalWidth / 2.f;
CGFloat halfHeight = totalHeight / 2.f;
CGFloat smallest = MIN(halfWidth, halfHeight);
CGFloat factor = smallest / 100.f;
factor = (factor > 1) ? 1 : factor;
_lineThickness = factor * lineThickness;
}
- (CGGradientRef)gradientWithColor:(UIColor *)c1 toColor:(UIColor *)c2 count:(CGFloat)colorNumb
{
const CGFloat *colorComponents1 = CGColorGetComponents(c1.CGColor);
CGFloat r1 = colorComponents1[0];
CGFloat g1 = colorComponents1[1];
CGFloat b1 = colorComponents1[2];
const CGFloat *colorComponents2 = CGColorGetComponents(c2.CGColor);
CGFloat r2 = colorComponents2[0];
CGFloat g2 = colorComponents2[1];
CGFloat b2 = colorComponents2[2];
CGFloat gradientColorComponents[] = {
r1,g1,b1,1,
r2,g2,b2,1,
r1,g1,b1,1,
};
CGColorSpaceRef rgb = CGColorSpaceCreateDeviceRGB();
CGGradientRef gradientRef = CGGradientCreateWithColorComponents(rgb, gradientColorComponents, NULL, colorNumb);
CGColorSpaceRelease(rgb);
return gradientRef;
}
@end
|
使用梯度及UIBezierPath绘制一个叶子
实现思路,创建一个继承自CYShapedView的子类,并将它命名为CYPetal。我们主要做的工作是在该类的DrawRect:方法里面
绘制一个叶子,首先要绘制的点有起点和终点,中间需要用曲线连接起来。那么接下来的工作就是找到这些点。
1
2
3
4
5
6
| 1. 起点(startPoint):CGPointMake(self.view.bounds.size.width / 2, 3)
2. 终点(endPoint):CGPointMake(self.view.bounds.size.width/ 2,self.view.bounds.size.height);
3. 左叶子控制点(leftCtl):CGPointMake(-self.view.bounds.size.width / 2,self.view.bounds.size.height/ 3)
4. 右叶子控制点(rightCtl):CGPointMake(self.view.bounds.size.width *1.5,self.view.bounds.size.height/ 3)
5. 中间控制点(midPoint):CGPointMake(self.view.bounds.size.width / 2,self.view.bounds.size.height * 0.8)
6. 边界点(corner):该点用来设置梯度的终点CGPointMake(self.view.bounds.size.width, 0)
|
下面来形象的展示下这些点的位置
以下是具体的实现代码,其实找到点之后,再用代码实现就很容易了。
1
2
3
4
5
6
7
8
9
10
11
12
13
14
15
16
17
18
19
20
21
22
23
24
25
26
| - (void)drawRect:(CGRect)rect {
CGFloat fullWidth = self.bounds.size.width;
CGFloat fullHeight = self.bounds.size.height;
CGFloat halfWidth = fullWidth / 2.f;
CGFloat halfHeight = fullHeight / 2.f;
CGPoint startPoint = CGPointMake(halfWidth, 3.f);
CGPoint midPoint = CGPointMake(halfWidth, halfHeight * 1.6f);
CGPoint endPoint = CGPointMake(halfWidth, fullHeight);
CGPoint leftCtl = CGPointMake(-halfWidth, halfHeight / 3.f);
CGPoint rightCtl = CGPointMake(fullWidth * 1.5f, halfHeight / 3.f);
CGPoint corner = CGPointMake(fullWidth, 0);
UIBezierPath *path = [UIBezierPath bezierPath];
[path moveToPoint:startPoint];
[path addCurveToPoint:endPoint controlPoint1:leftCtl controlPoint2:midPoint];
[path addCurveToPoint:startPoint controlPoint1:midPoint controlPoint2:rightCtl];
[path addClip];
CGGradientRef gradient = [self gradientWithColor:self.innerColor toColor:self.outerColor count:3];
CGContextRef context = UIGraphicsGetCurrentContext();
CGContextDrawLinearGradient(context, gradient, CGPointZero, corner, 0);
path.lineWidth = self.lineThickness;
[self.strokeColor setStroke];
[path stroke];
}
|
贴个图感受下最后绘制出来的叶子
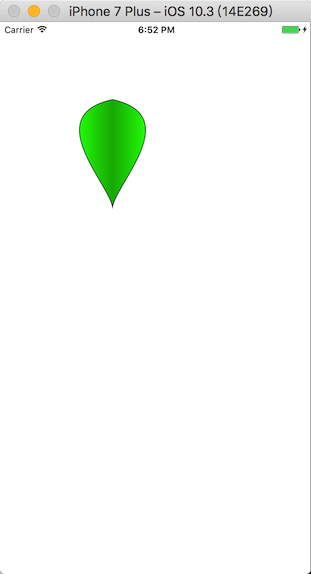
绘制笑脸
实现思路,同绘制叶子一样,我们先搞清楚需要的绘制参数。首先我们要绘制一个圆,用来显示脸。其次需要绘制一条曲线,用来显示嘴巴。最后还要绘制俩个椭圆用来显示眼睛。那么总结起来就是。
- 绘制圆,并做圆心向外发散的梯度处理
- 绘制曲线,俩个嘴角受中心点控制的贝塞尔曲线。
- 绘制椭圆,找到合适的位置调用贝塞尔的矩形框绘制椭圆路径即可。
实现的代码也比较简单,如下
1
2
3
4
5
6
7
8
9
10
11
12
13
14
15
16
17
18
19
20
21
22
23
24
25
26
27
28
29
30
31
32
33
34
35
36
37
38
39
40
41
42
43
44
45
46
47
48
49
50
51
| - (void)drawRect:(CGRect)rect {
CGFloat fullWidth = self.bounds.size.width;
CGFloat fullHeight = self.bounds.size.height;
CGFloat halfWidth = fullWidth / 2.f;
CGFloat halfHeight = fullHeight / 2.f;
CGFloat radius = MIN(halfWidth, halfHeight);
CGPoint center = CGPointMake(halfWidth, halfHeight);
UIBezierPath *bezier = [UIBezierPath bezierPath];
[bezier addArcWithCenter:center radius:radius startAngle:0 endAngle:M_PI * 2 clockwise:YES];
[bezier addClip];
CGGradientRef gradient = [self gradientWithColor:self.innerColor toColor:self.outerColor count:2];
CGContextRef graphics = UIGraphicsGetCurrentContext();
CGContextDrawRadialGradient(graphics, gradient, center, 0, center, radius, 0);
bezier.lineWidth = self.lineThickness * 1.7;
[self.strokeColor setStroke];
[bezier stroke];
[bezier removeAllPoints];
bezier.lineWidth = self.lineThickness;
[bezier moveToPoint:CGPointMake(halfWidth * 0.5, halfHeight * 1.3)];
[bezier addQuadCurveToPoint:CGPointMake(halfWidth * 1.5, halfHeight * 1.3)
controlPoint:CGPointMake(halfWidth, fullHeight * 0.91)];
[bezier stroke];
bezier = [UIBezierPath bezierPathWithOvalInRect:CGRectMake(fullWidth / 3 - halfWidth * .1,
fullHeight / 3.f,
halfWidth * .2,
halfHeight * .3)];
bezier.lineWidth = self.lineThickness;
[bezier fill];
[bezier stroke];
bezier = [UIBezierPath bezierPathWithOvalInRect:CGRectMake(fullWidth / 3 * 2 - halfWidth * .1,
fullHeight / 3.f,
halfWidth * .2,
halfHeight * .3)];
bezier.lineWidth = self.lineThickness;
[bezier fill];
[bezier stroke];
}
|
按照惯例,贴下实现的效果图
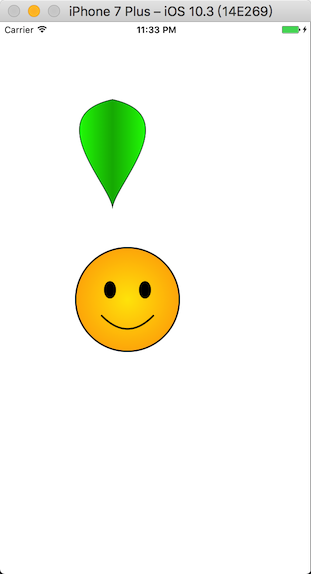
动起来
现在我们希望能用之前绘制的俩个图形,集合动画,做出一个类似太阳的动画特效。
还是谈谈实现的思路:先用之前的CYSmile绘制一个太阳,之后采用CYPetal绘制一组阳光,阳光的绘制有技巧,需要绘制相同frame的光芒视图15个,之后采用transform的方式,设置位置偏移。此外由于要实现动画效果,需要对光芒的锚点位置进行设置。以下是一个view设置的时候,太阳和光芒的位置设置。
1
2
3
4
5
6
7
8
9
10
11
12
13
14
15
16
17
18
19
20
21
22
| ----------------------------------------------------------------------
| |
| |
| |
| ------------------------------- |
| | ------- | |
| | | | | |
| | | 光 | | |
| | | 芒 | | |
| | | 区 | | |
| | | | | |
| | | | | |
| | ------- | |
| | | |
| | 太阳区 | |
| | | |
| ------------------------------- |
| |
| |
| |
| |
------------------------------------------------------------------------
|
具体的话还是看下代码吧。
1
2
3
4
5
6
7
8
9
10
11
12
13
14
15
16
17
18
19
20
21
22
23
24
25
26
27
28
29
30
31
32
33
34
35
36
37
38
39
40
41
42
43
44
45
46
47
48
49
50
51
52
53
54
55
56
57
58
59
60
61
62
63
64
65
66
67
68
69
70
71
| - (void)createSunshine
{
CGFloat fullWidth = self.bounds.size.width;
CGFloat fullHeight = self.bounds.size.height;
CGFloat halfWidth = fullWidth / 2.f;
CGFloat halfHeigt = fullHeight / 2.f;
CGRect sunRect = CGRectMake(halfWidth - fullWidth / 4, halfHeigt - fullHeight / 4, halfWidth, halfHeigt);
CGRect sunshineRect = CGRectMake(halfWidth - fullWidth / 40, halfHeigt - fullHeight / 8, fullWidth / 20, fullHeight / 4);
UIView *shineView = [[UIView alloc]initWithFrame:self.bounds];
self.shineLayer = shineView.layer;
[self addSubview:shineView];
for (CGFloat i = M_PI / 10; i < M_PI * 2; i += M_PI / 7.5) {
CYPetal *petal = [[CYPetal alloc]initWithFrame:sunshineRect];
petal.innerColor = [UIColor yellowColor];
petal.outerColor = [UIColor colorWithRed:1 green:0.8 blue:.2 alpha:1];
petal.lineThickness = 40.f;
petal.strokeColor = [UIColor whiteColor];
[shineView addSubview:petal];
petal.layer.anchorPoint = CGPointMake(.5, 2);
petal.transform = CGAffineTransformMakeRotation(i);
}
[self addRotationAnimation];
CYSmile *smile = [[CYSmile alloc]initWithFrame:sunRect];
smile.innerColor = [UIColor yellowColor];
smile.outerColor = [UIColor colorWithRed:1 green:.8 blue:.2 alpha:1];
[self addSubview:smile];
}
- (void)addRotationAnimation
{
CABasicAnimation *basicAnimation = [CABasicAnimation animationWithKeyPath:@"transform.rotation"];
basicAnimation.duration = 10;
basicAnimation.fromValue = @0;
basicAnimation.speed = self.speed;
basicAnimation.toValue = @(M_PI * 2);
basicAnimation.repeatCount = CGFLOAT_MAX;
[self.shineLayer addAnimation:basicAnimation forKey:@"rotation"];
basicAnimation.keyPath = @"opacity";
basicAnimation.duration = .5f;
basicAnimation.autoreverses = YES;
basicAnimation.fromValue = @0.7;
basicAnimation.toValue = @1.0;
[self.shineLayer addAnimation:basicAnimation forKey:@"fade"];
basicAnimation.keyPath = @"transform.scale";
basicAnimation.fromValue = @0.9;
basicAnimation.toValue = @1.1;
[self.shineLayer addAnimation:basicAnimation forKey:@"scale"];
}
|
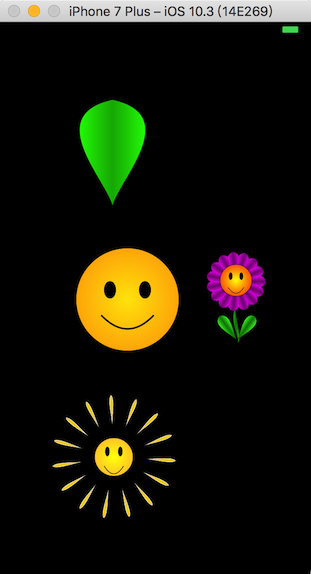
最后的效果图如下
组合绘制花朵
花朵包括的元素主要有笑脸、花瓣、茎、叶子。这些元素(除了茎)都可以使用之前的组件来绘制出来。
茎
坐标路径大概如下,并不一定是这样,手工绘制敬请谅解
1
2
3
4
5
6
7
8
9
10
11
12
13
14
15
16
17
18
19
20
21
22
|
|
茎的绘制和之前花瓣的绘制差不多,都是要选择一个起点和一个终点,然后绘制根据俩个锚点,绘制出相应的图形,具体绘制就不细说了,还是附上代码感受下吧
1
2
3
4
5
6
7
8
9
10
11
12
13
14
15
16
17
18
19
20
21
22
23
24
25
26
27
28
29
30
31
| - (void)drawRect:(CGRect)rect
{
CGFloat fullWidth = self.bounds.size.width;
CGFloat fullHeight = self.bounds.size.height;
CGFloat halfWidth = fullWidth / 2;
CGFloat halfHeight = fullHeight / 2;
CGPoint startPoint = CGPointMake(halfWidth * .9, 0);
CGPoint midPoint = CGPointMake(halfWidth, halfHeight);
CGPoint endPoint = CGPointMake(halfWidth * .9, fullHeight);
CGPoint corner = CGPointMake(fullWidth, 0);
CGPoint leftCtl = CGPointMake(0, halfHeight);
CGPoint rightCtl = CGPointMake(fullWidth, fullHeight);
UIBezierPath *path = [UIBezierPath bezierPath];
[path moveToPoint:startPoint];
[path addCurveToPoint:endPoint controlPoint1:leftCtl controlPoint2:rightCtl];
[path addCurveToPoint:startPoint controlPoint1:rightCtl controlPoint2:midPoint];
[path closePath];
[path addClip];
CGContextRef ref = UIGraphicsGetCurrentContext();
CGGradientRef gradient = [self gradientWithColor:self.innerColor toColor:self.outerColor count:3];
CGContextDrawLinearGradient(ref, gradient, CGPointZero, corner, 0);
path.lineWidth = self.lineThickness;
[self.strokeColor setStroke];
[path stroke];
}
|
组合花朵
组合花朵,主要就是在于计算笑脸、茎、花瓣、叶子等的坐标位置。然后还有就是设置它们的颜色。此外要注意设置花朵的frame的时候,要保持宽高比为7 : 10,这样才能生成比较好的效果。
下面附上花朵的位置设置代码:
1
2
3
4
5
6
7
8
9
10
11
12
13
14
15
16
17
18
19
20
21
22
23
24
25
26
27
28
29
30
31
32
33
34
35
36
37
38
39
40
41
42
43
44
45
46
47
48
49
50
51
52
53
54
55
56
57
58
59
| - (id)initWithFrame:(CGRect)frame
{
self = [super initWithFrame:frame];
if (self) {
[self p_createFlower];
}
return self;
}
- (void)p_createFlower
{
CGFloat fullwidth = self.bounds.size.width;
CGFloat fullHeight = self.bounds.size.height;
CGFloat halfWidth = self.bounds.size.width/2.f;
CGFloat halfHeight = self.bounds.size.height/2.f;
CGRect smileRect = CGRectMake(halfWidth/2, halfHeight/4*.9,
halfWidth, halfHeight);
CGRect petalRect = CGRectMake(halfWidth-fullwidth/10, fullHeight/5,
fullwidth/5, fullwidth/2);
CGRect leafRect = CGRectMake(halfWidth-fullwidth/12, fullHeight*.84,
fullwidth/5, fullwidth/2);
CGRect stemRect = CGRectMake(halfWidth-fullwidth/8, halfHeight*1.3,
fullwidth/4, halfHeight*.8);
CYStem *stem = [[CYStem alloc]initWithFrame:stemRect];
stem.outerColor = [UIColor colorWithRed:0 green:0.5 blue:0 alpha:1];
stem.innerColor = [UIColor colorWithRed:.3 green:1 blue:.2 alpha:1];
[self addSubview:stem];
for (CGFloat i = M_PI / 10; i < M_PI * 2; i += M_PI / 7.5) {
CYPetal *petal = [[CYPetal alloc]initWithFrame:petalRect];
petal.outerColor = [UIColor purpleColor];
petal.innerColor = [UIColor colorWithRed:1 green:0 blue:1 alpha:1];
[self addSubview:petal];
petal.layer.anchorPoint = CGPointMake(.5, 1);
petal.transform = CGAffineTransformMakeRotation(i);
}
for (CGFloat i = -M_PI/5; i <= M_PI/5; i += M_PI * 2/5) {
CYPetal *leaf = [[CYPetal alloc]initWithFrame:leafRect];
leaf.outerColor = [UIColor colorWithRed:0 green:.5 blue:0 alpha:1 ];
leaf.innerColor = [UIColor colorWithRed:.3 green:1 blue:.2 alpha:1];
[self addSubview:leaf];
leaf.layer.anchorPoint = CGPointMake(.5, 1);
leaf.transform = CGAffineTransformMakeRotation(i);
}
CYSmile *smile = [[CYSmile alloc]initWithFrame:smileRect];
smile.innerColor = [UIColor yellowColor];
smile.outerColor = [UIColor colorWithRed:1 green:.4 blue:0 alpha:1];
[self addSubview:smile];
}
|
参考资料
